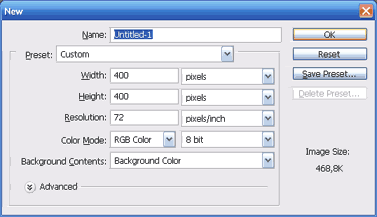
Step 1: Create New Photoshop Document with background color: #5A5A5A
 Step 2:
 Create New Layer and Rename it to bg. Using Retangular Marquee Tool and draw one Retangular Marquee. Fill it with this pattern:
 Step 3:
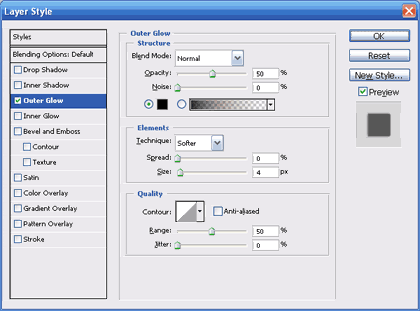
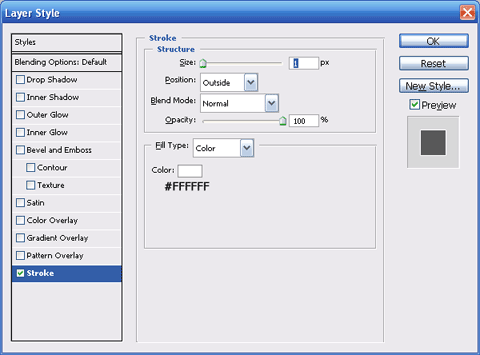
 Create New Layer and Rename it to Border. On this Layer Click Edit » Stroke, One dialog appear. Apply setting like picture below and click OK button.

Next, Apply Outer Glow setting for this layer:
 Step 4:
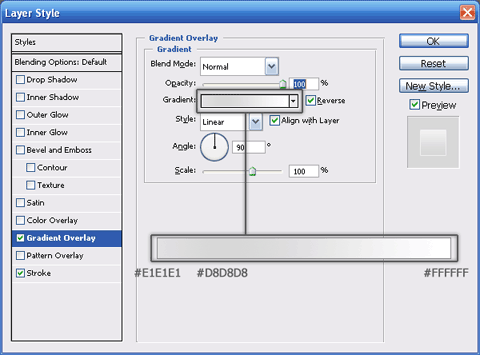
 Create New Layer Between Layer bg and Border and Rename it to line top. Using Retangular Marquee Tool and draw one Retangular Marquee

Fill it with any color you like and apply these Layer Style setting:
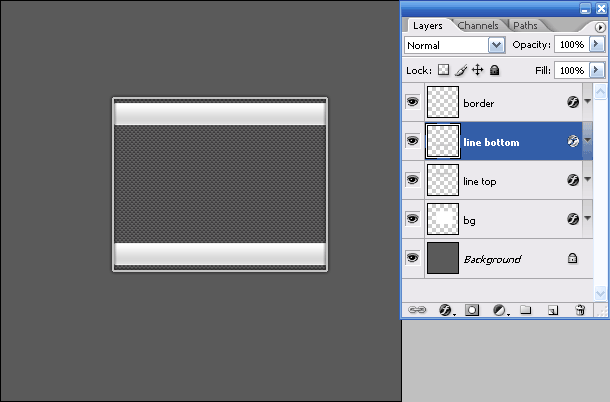
Duplicate line top Layer and Rename new layer to line bottom. Scroll it to bottom of your content box:
 Step 5:
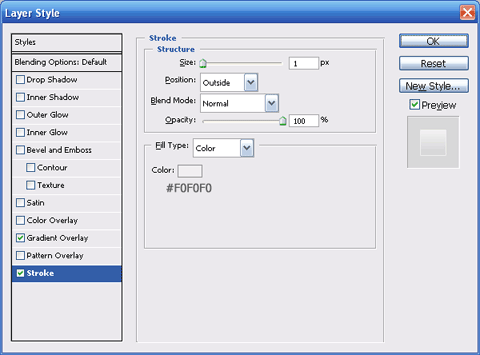
 Create New Layer and rename to content. On this layer, using Retangular Marquee Tool draw one Retangular Marquee inside your content box, and fill it with color: #C8C8C8

Then, add stroke in Layer Style with Color: #FFFFFF and Size: 1px
 Step 6:
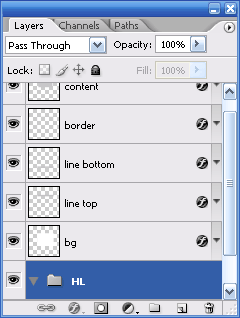
 Create New Group, rename this group to HL and scroll this Group to bottom of your Layers windows:
Add new layer in this group and rename it to line, on this layer using Pen Tool to draw one Custom Shape Layer:

Apply these Layer Style for this layer:

 Step 7:
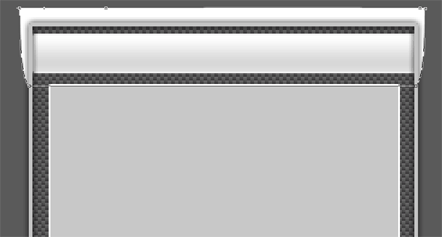
 Add more details for this group. I added one line at bottom of line Layer:

Duplicate HL group and name is HL bottom. Click Edit » Transform » Flip Verticle. Scroll this group content to bottom at your content box:
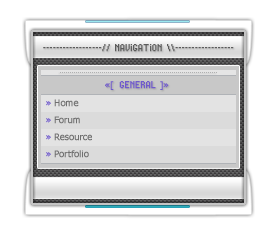
 Final:
 Add content and some details for your content box, here is my final result:


Andy
StealthDesignz.com
I think you will like it because I wrote this tutorials when see that professional content box in your website!
I will update this blog soon! :D